
Contractor Stories

Building a hybrid permeable project
By Tom HatlenLate one night Jeremy Martin got an email from a prospective client. He replied right away. So did the client. And they began a dialogue that grew into a $130,000 permeable hybrid project for Willow Gates Landscaping.
Jeremy says, “Sauders Hardscape, our supplier, had suggested the client call me and one other contractor. I'm not sure he ever called the other contractor. There were no competing bids. He just immediately connected with me and trusted me.”
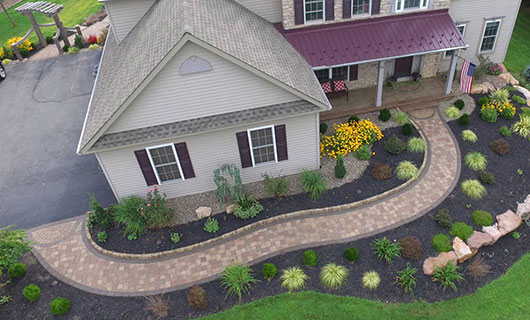
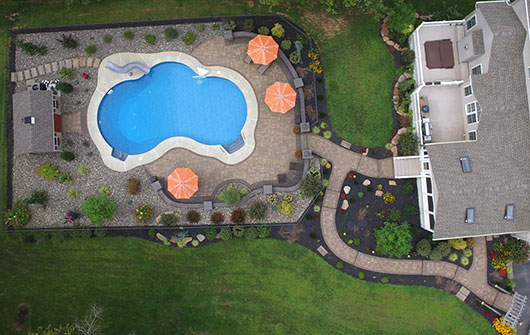
When Jeremy first arrived at the property, the existing backyard was a grassy lawn with a new pool and 3’ concrete pool deck already in place. The biggest issue was drainage. Jeremy says the property was graded so that nearly all the runoff – from the driveway, the entire backyard and pool area – was all directed to where the patio is today.
Project Profile
Wallover ResidenceMorgantown, PA
Design/build contractor
Willow Gates Landscaping LLCMohnton, PA
Project Designer & Manager
Jeremy R. MartinProject value
$100,000+In-house work
Retaining wallsConcrete pavers (1,900 sf)
Underground drainage
Low voltage electric
Plantings & landscaping
Stormwater management
Work done by others
PoolFencing
Year completed
2015Stormwater managing
First step in fixing the drainage was raising the patio area about 2’ providing enough slope to carry all that runoff into the grassy area at the far end of the backyard. Then they installed a permeable stormwater management system.Jeremy says he initially proposed that they go permeable with the project for aesthetic reasons. “I hate drains and so does the client, and we needed to evacuate the water away from the walls and out of the pool area. Ultimately, a permeable patio was the only way to satisfy the township’s stormwater management requirements.”
The township limited the percentage of impervious surface area a property can have. “They wanted us to show evidence in a stormwater management plan that the runoff from the site over a 2-year period after construction would be less than the amount of runoff over a 1-year period before construction. In essence, they wanted to lessen runoff, not just limit stormwater runoff to its current levels!”
Working with municipal requirements
Jeremy says most municipalities in the Chesapeake Bay watershed have limits on additional impervious surfaces. So, he’s become familiar with infiltration rates and stormwater storage capacity and usually does stormwater management plans in house. He says it’s not too hard since most municipalities ask for simple calculations (typically storing 1” to 4” of rainfall) that can be applied to any small project.For this project, however, the township needed specific infiltration rates for the local soil. Jeremy turned to a local consultant that specialized in percolation testing, septic system design and soil science services. Most importantly, the township knows the consultant well, respects his judgment and accepts his calculations.
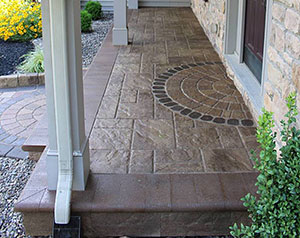
The front steps are an overlay over poured concrete. The pavers are the same as the rest of the project, 2-3/8” Techo-Bloc Blu 60. Jeremy says they typically do a couple overlays a year. “It’s usually a situation like this where we’re doing a walkway up to a porch and they want the porch to match.”
“He had done perc testing for that whole development probably 5 years earlier for the on-lot septic systems. He already had all the soil infiltration information he needed on file from the site. We gave him details of the project including the square footage of additional paving, void space & storage capacity of the base, etc., and he did the calculations from there.”
Jeremy says the consultant saved them a 2nd time in the construction approval process. “The township’s engineer said we needed a 100’ setback from any well. That would have pretty much killed the project because the neighbor’s well is only 30’ away from the patio. The consultant said, ‘There's actually an exemption for anything under 1 acre where the well setback doesn’t apply.’”
The engineer looked it up, agreed the consultant was right and the project went forward.
Preventing soil from sinking
Before launching into excavation, they had to figure out what to do about the backfill around the pool. Jeremy called the pool builder to see what was underneath the concrete deck. “He was pretty honest. He said it’s all soft fill. ‘You can put your pavers in, but the dirt beneath that will settle and the paver base is going to follow it.’”
A 24” x 24” flowable fill beam blocks the paver base off from the soft backfill around the pool and prevents pavers from settling when the backfill does.
After looking at options for stabilizing the area, they decided to pour a 24” x 24” flowable fill beam around the outside of the pool deck to create a solid mass blocking the paver base off from the soft area. “That way, when the soil settles under the pool deck, our paver base can't follow it. The flowable fill serves as the paver base for the first 24” around the pool deck with a bedding layer of #8 stone.”
Flowable fill is a low strength mix of cement, fly ash, water, sand and other admixtures that typically cures below 300 PSI. No gravel. “It's solid enough that it won't settle, but it’s soft enough that you can dig into it with a shovel or hammer a spike into it. It’s often used in utility repair trenches, things like that where you don't want it to settle. But if you ever need to get in there, you can dig through it unlike regular concrete.”
The permeable hybrid structure
Aside from the flowable fill around the pool, the base beneath the rest of the paver area is all clean stone, but only a 24” strip of pavers is permeable. It’s the section of cobblestone next to the walls. The rest of the paver area is jointed with polymeric sand.Stormwater flows over the polymeric sand area to the permeable strip and into the vast drainage stone area beneath the polymeric sand section of pavers. There, it infiltrates into the subsoil/groundwater. Any excess is diverted into the grassy lawn beyond the pool through perforated pipe.

The 24” cobblestone strip (Techo-Bloc Antika pavers) next to the retaining walls is the only permeable pavement. The rest is sealed with polymeric sand. The top 3/4” of stone in the joints around the cobblestone is pea gravel. The client didn’t like the sharp edges and gravel look of #8 angular stone. For structural integrity, the crew filled the joints most of the way with #8 stone and compacted. Then they used a shop vac to remove extra stone, topped it off with of pea gravel and sealed with Alliance Gator Stone Bond XP to bind the pea gravel together.
Jeremy says they didn’t make the entire surface permeable because they were concerned about loose joint stone getting into the pool and they could achieve the level of drainage needed thru the 24” permeable paver strip.
The deepest section of clean stone is the fill area next to the pool. It gets as deep as 20”. “There was still a very soft area on right side of that pool. So it was a good place to go deeper to get the storage we needed.”
Because that area provided so much stormwater storage, they didn’t need to go as deep in other areas.
Poly sand over clean stone
Permeable projects like this make up a small share of Jeremy’s work, but he still uses a permeable-style base with clean stone on nearly every job. They combine it with polymeric sand in the joints over a #8 or #9 stone bedding layer.Jeremy says the voids between #8 or #9 stone are small enough that most polymeric sand stays in the joints without sifting through. In dry conditions, he recommends wetting the bedding layer before laying pavers so the polymeric sand will stick to the bedding layer and minimize polymeric sand loss.
Jeremy says they pride themselves on details like the subtle curves in the walkways, and the inlays at each intersection. He says these things make a difference to people. “We don't do a lot of 6 figure jobs, but with every one we've done there were no competing bids. There was no concern about getting a second price. They saw the work that we did, and they made the decision that we were going to do the job for them.”
“We're using clean stone for the integrity of the system. It takes less compaction effort, and our polymeric sand holds up much longer because there's good drainage. It’s particularly important in shaded areas that hold moisture which can prevent the polymeric sand from curing.
“With polymeric sand over clean stone, there's really nothing there to hold the moisture. It allows your polymeric sand to dry and bond nicely.”
He says clean stone also makes it easier to work in the winter because it doesn’t freeze up like crusher run can.
It’s only been 4 years since they finished the job and it’s holding up well. Just the same, Jeremy has learned new things that they would have applied if they were to do it again. Today they would have used an all-clean stone base under the retaining walls and they likely would have used EASYJoint, a permeable joint sand from Azpects, for all pavers.
Jeremy says, “I try to stay current. I have seen the work of some very old established businesses that didn’t stay current, and now I’m out fixing their work. My philosophy is: if you aren’t plugged into the industry, your work is going to suffer and you’re going to be left behind. I consider education so important that I became an ICPI and NCMA instructor. There’s no way I could successfully complete the projects I do without the ICPI, NCMA and other courses I’ve taken.”
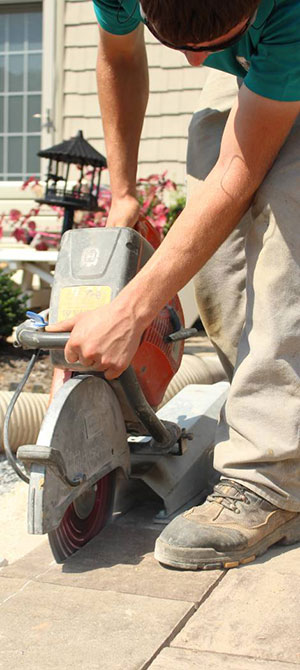
Taking silica dust seriously
Jeremy spent the months before the June 2017 OSHA regulations took effect searching for a dust collection system. He didn’t find what he wanted so he developed his own. His system consists of the Dust Killer vacuum and 6” hoses that connect the vacuum to 3 saw attachments. One fits a cutoff saw for cutting pavers in place. Another fits a cutoff saw for cutting wall block. A third attaches to a table saw. At 1900+ cubic feet per minute (CFM), the Dust Killer can operate a mix of 3 attachments at once.Jeremy says the high CFM and 6” hose are important. To cut all day without wearing a respirator, OSHA requires that exposure to respirable silica cannot exceed 50 mg per cubic meter of air. On a 14” saw, OSHA requires 350 CFM. “You simply can’t physically flow that amount of air through a small hose. That’s why we use only 6” hose.”
For a free 7-step crash course on OSHA silica dust laws and how to comply, visit www.DustKiller.tools
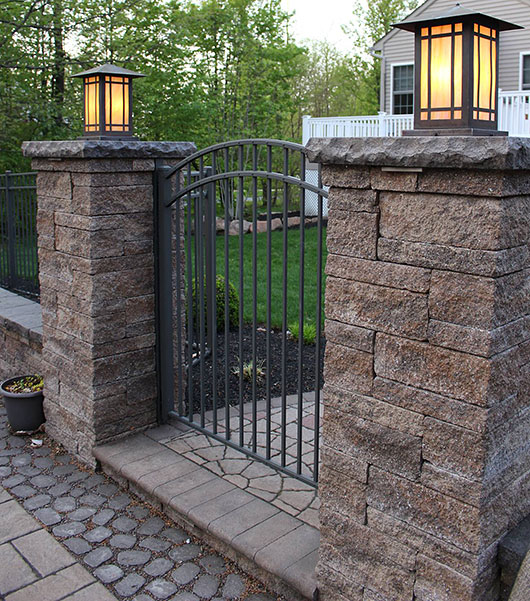
The client wanted the pillars a little taller so Jeremy raised them 3” by adding a 14-1/2” wet cast cap on top of a 12” cap. The pillars are built with geogrid every 18” and filled halfway with clean stone on a 12” flowable fill base. Jeremy says they used flowable fill because the pillar height (5’) exceeded the limits recommended for a gravel base.

All pavers and wall blocks are Techo-Bloc. All step and wall lights are Integral Lighting IL600 LED fixtures.